

TL;DR:
- The guest list planning process involves setting a firm maximum number based on budget and venue capacity. It requires organizing potential guests into priority tiers and tracking details in a digital spreadsheet to ensure smooth management. Early communication and disciplined updates help prevent last-minute issues and protect relationships during event planning.
The guest list planning process is the systematic method of creating, organising, and managing your event invitations to produce a successful celebration. Whether you are planning a wedding, a corporate launch, or a milestone birthday, your guest list shapes every other decision you make. It determines your venue size, your catering budget, your seating chart, and the overall atmosphere of the day. Getting this process right from the start saves you from costly changes later and protects relationships along the way.
What is the guest list planning process?
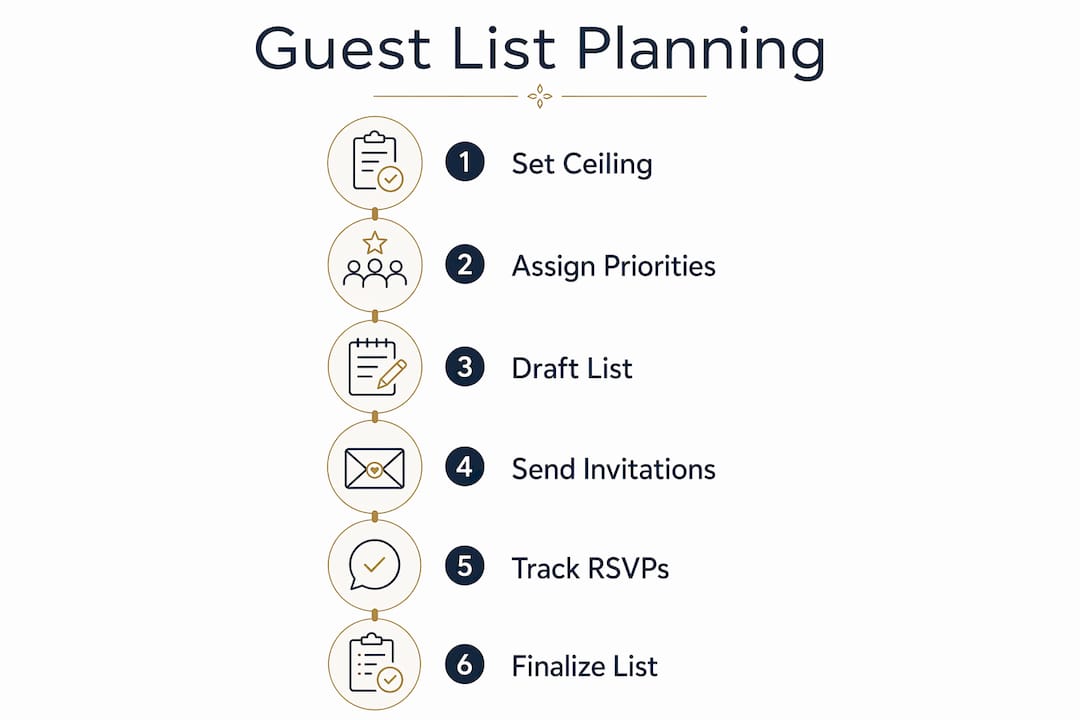
The guest list planning process is a structured approach to deciding who attends your event, in what order they are invited, and how their attendance is tracked through to the event day. Planners and event coordinators refer to this as “invitation management” in professional contexts, though the guest list planning process is the term most planners use in everyday practice. The process covers three distinct phases: setting limits, drafting and refining the list, and managing RSVPs through to final confirmation.
The foundation of good guest list management is a firm maximum guest count set before you write a single name. Setting this maximum from your budget and venue capacity prevents over-inviting and makes difficult decisions far easier. Without a hard ceiling, lists grow by default rather than by choice.
How do you set guest limits and priorities?
Setting guest limits is the first and most consequential step in planning a guest list. Your maximum number must come from two fixed constraints: your per-head budget and your venue’s licensed capacity. Divide your total event budget by your estimated cost per guest to get a ceiling. Then check that ceiling against your venue’s maximum occupancy and take the lower of the two figures.
Once you have a ceiling, assign every potential guest to one of three priority tiers:
- Must-invite guests. These are people whose absence would genuinely change the character of the event. For a wedding, this is immediate family and closest friends. For a corporate event, this is key clients and senior stakeholders.
- Strongly want guests. These are people you genuinely want present but whose absence would not alter the event’s core meaning. Extended family, close colleagues, and long-standing friends typically sit here.
- If-budget-allows guests. These are people you would be pleased to include but who are not central to the occasion. Tiered guest categories make this prioritisation clear and reduce stress when cuts are necessary.
Your plus-one policy also belongs in this phase. Apply it consistently across all guests at the same tier. Inconsistency creates resentment and awkward conversations later.
Pro Tip: Decide your plus-one rule before you share the list with anyone. Changing it mid-process after guests have already told their partners is far harder to manage than setting it clearly from the start.
How do you draft and organise your guest list efficiently?
A well-organised guest list is a living document, not a static spreadsheet. Build it in stages rather than trying to produce a final version in one sitting.
- Start with separate lists. Each host or decision-maker writes their own list independently. Combining lists too early leads to one person’s priorities dominating the other’s.
- Merge and remove duplicates. Combine all individual lists into one master document. Remove duplicates and note where the same person appears on multiple lists, as this signals a strong case for inclusion.
- Apply your priority tiers. Tag every name with its tier (must-invite, strongly want, if-budget-allows). This step converts a raw list into a managed one.
- Filter by connection quality. For anyone in tier two or three, ask two questions: Have you been in contact with this person in the past two years? Would their absence genuinely disappoint you? If the answer to both is no, move them to a reserve list.
- Build your A-list and B-list. Your A-list is everyone in tiers one and two who fits within your ceiling. Your B-list is the if-budget-allows tier, held in reserve for when A-list guests decline.
Track every guest in a digital spreadsheet with dedicated columns. A well-structured spreadsheet should include name, invitation sent date, RSVP status, meal choice, plus-one name, and seating assignment. This single document becomes the source of truth for your caterer, your venue coordinator, and your on-the-day team.
| Column | Purpose |
|---|---|
| Guest name | Primary identifier for all tracking |
| Invitation sent | Confirms dispatch and triggers follow-up timeline |
| RSVP status | Tracks confirmed, declined, and pending responses |
| Meal choice | Feeds directly into catering numbers |
| Plus-one name | Prevents seating errors and name-card mistakes |
| Seating assignment | Links guest data to your floor plan |

Pro Tip: Colour-code your RSVP column: green for confirmed, red for declined, and amber for no response. A quick visual scan tells you exactly where you stand without reading every row.
How do you manage invitations, RSVPs, and adjustments?
Invitation timing follows a clear sequence. A standard planning timeline recommends drafting your initial list 10–12 months before the event, finalising your mailing list 6–8 months out, sending invitations 6–8 weeks before the date, and setting your RSVP deadline 3–4 weeks prior. This timeline gives you enough buffer to handle seating charts and catering adjustments without rushing.
Managing your B-list requires particular care. B-list invitations should go out at least 2 weeks before the event, and ideally 4–6 weeks ahead, to give those guests fair notice and time to respond. Sending them too late signals that they were an afterthought, which damages the relationship regardless of your intentions.
Key practices for the RSVP phase:
- Set your RSVP deadline at 3–4 weeks before the event to allow time for seating and catering finalisation.
- Send a polite reminder to non-responders one week after the deadline, not before. Chasing too early creates pressure; chasing too late leaves you without accurate numbers.
- Track responses digitally and follow up with non-responders by phone rather than a second written message. A brief call resolves ambiguity faster than an email chain.
- Share your final confirmed count with your caterer and venue coordinator at least two weeks before the event. Most venues require a guaranteed minimum number by this point.
Pro Tip: When following up with non-responders, frame the call around logistics rather than obligation. “We need to confirm numbers for catering” lands better than “We haven’t heard from you yet.”
Understanding guest experience from a hospitality perspective also helps here. Guests who receive clear, timely communication feel valued before the event even begins.
How do you prepare your final list for event day?
The final guest list is a confirmed, locked document shared with every relevant vendor at least two weeks before the event. Your caterer needs it for meal counts. Your venue needs it for room layout. Your on-the-day coordinator needs it for check-in.
Seating charts deserve more attention than most planners give them. Place guests based on relationship groups, not just table numbers. Guests who know each other well create energy at a table. Guests who share nothing in common create awkward silences that reflect poorly on the event’s atmosphere. Consider customising the guest experience by grouping guests around shared interests or professional connections where the event format allows.
For check-in, choose a system that matches your event’s scale:
- Paper check-in list. Reliable for small gatherings under 50 guests. Requires no technology but slows down arrival for larger events.
- Digital check-in app. Faster for events of 50 or more. Allows real-time updates and instant headcount confirmation.
- Name card collection. Guests collect their pre-printed place card at the door. Works well for seated dinners where every guest has an assigned seat.
Assign at least one person specifically to guest check-in. That person’s sole responsibility is managing arrivals, handling last-minute changes, and directing guests to their seats. Splitting this role across multiple tasks creates gaps.
What are the most common guest list challenges?
Obligation invites are the most consistent source of stress in any guest list process. Accepting that obligation invites are normal and setting clear boundaries early reduces the emotional weight of these decisions. The key is to treat your guest ceiling as a fixed constraint rather than a negotiable preference.
“Communicating your guest limit clearly and early, before family members start suggesting names, is the single most effective way to prevent list inflation and protect relationships throughout the planning process.”
Family pressure is the most common cause of guest list bloat. The solution is to set boundaries early and frame them around logistics rather than personal preference. “Our venue holds 80 guests and we are already at capacity” is a factual statement. It removes the emotional charge from a conversation that can otherwise feel like a personal rejection.
Pro Tip: If you receive pushback on guest limits, offer an alternative. A post-event celebration, a casual drinks gathering, or a personal visit gives excluded guests a meaningful connection to the occasion without inflating your event numbers.
For festive or seasonal events, meal planning and dietary tracking within your guest list spreadsheet also prevents last-minute catering crises. Record dietary requirements at the RSVP stage, not the week before the event.
Key takeaways
The guest list planning process works best when you set a firm ceiling first, assign priority tiers before writing names, and track every detail in a single digital document from draft to event day.
| Point | Details |
|---|---|
| Set your ceiling first | Calculate your maximum guest count from budget and venue capacity before listing any names. |
| Use priority tiers | Assign every guest to must-invite, strongly want, or if-budget-allows to make cuts less stressful. |
| Track everything digitally | A spreadsheet with RSVP status, meal choice, and seating assignment keeps all vendors aligned. |
| Time your invitations carefully | Send A-list invitations 6–8 weeks out and B-list invitations at least 4–6 weeks before the event. |
| Communicate limits early | Tell family your guest ceiling before they start suggesting names to prevent list inflation. |
What I have learned from watching guest lists go wrong
After working alongside event planners on everything from intimate Cape Town wine estate dinners to large corporate launches, the pattern I see most often is the same: hosts delay setting a firm guest ceiling, and by the time they do, the list has already grown beyond what the budget or venue can support. The cuts that follow are painful in a way that early limits never are.
The second mistake I see consistently is treating the guest list as a one-time task rather than a managed document. A list that is not updated in real time becomes unreliable within weeks. When your caterer is working from a version that is two revisions old, the consequences show up on the day in the worst possible ways.
What actually works is treating your guest list the way a project manager treats a task tracker. Every change gets logged. Every RSVP gets recorded the day it arrives. Every follow-up gets a note. This discipline feels excessive in the early months and saves enormous stress in the final fortnight. The VIP event planning principles that apply to high-end events apply equally to any celebration where the guest experience matters.
The most underrated advice I can offer is this: make your decisions early and communicate them clearly. Guests who understand the constraints respect them. Guests who feel managed without explanation feel excluded. The difference between those two outcomes is almost always the quality of your communication, not the size of your list.
— Coert
How Winelandsfunction supports your event planning
Planning a guest list is one part of a much larger coordination effort, and having expert support makes the difference between a stressful process and a confident one.

Winelandsfunction specialises in luxury event coordination for weddings, corporate events, and bespoke celebrations in Cape Town and the surrounding Winelands. The team manages every layer of event logistics, from initial guest list strategy through to on-the-day check-in and seating management. If you are planning a celebration and want professional guidance on guest management, venue selection, and event execution, Winelandsfunction offers the expertise to bring it together with precision and care.
FAQ
What is the guest list planning process?
The guest list planning process is the structured method of deciding who to invite, assigning priority tiers, tracking RSVPs, and confirming attendance through to event day. It covers everything from setting your maximum guest count to finalising seating assignments.
When should I send out invitations?
Send A-list invitations 6–8 weeks before your event and set your RSVP deadline 3–4 weeks out. B-list invitations should go out at least 4–6 weeks before the event to give those guests adequate notice.
How do I manage a B-list without offending guests?
Send B-list invitations promptly once A-list declines come in, and allow at least 4–6 weeks before the event. Frame the invitation warmly and without reference to the list structure.
What should a guest list spreadsheet include?
A guest list spreadsheet should include the guest’s name, invitation sent date, RSVP status, meal choice, plus-one name, and seating assignment. These fields keep your caterer, venue, and coordinator working from the same accurate information.
How do I handle family pressure to add more guests?
Set your guest ceiling before family members begin suggesting names and frame it as a fixed logistical constraint. Offering an alternative gathering for those who cannot be included helps manage expectations without damaging relationships.
Recommended
- VIP event essentials: the planner’s complete guide – Winelands Function – For Every Occasion, Your Celebration
- Wedding Planning Step by Step: Your Complete Guide – Winelands Function – For Every Occasion, Your Celebration
- Private celebration essentials list: your complete guide – Winelands Function – For Every Occasion, Your Celebration
- Event Planning Step by Step for Elegant Celebrations – Winelands Function – For Every Occasion, Your Celebration